Exercise: Managing tone
I chose to process this contra jour image:
Before processing:

After processing: I decided that the contrast didn’t need adjusting. The black point, white point and midtone adjustment seems to have taken care of the contrast as well.

RAW processing: Altering the exposure had little effect on this image’s black point so I moved the slider to achieve the correction. Again the contrast didn’t need adjusting.

Exercise: Managing colour
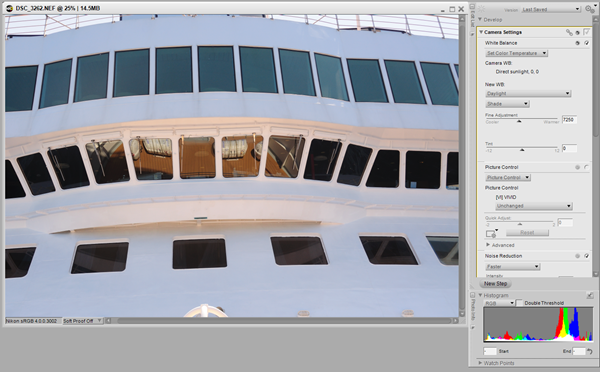
This is an interesting image, the white balance was set on direct sunlight so the shade areas have blue cast as expected. However, the reflection of the sunlit deck in the centre windows has the expected colours.
JPG processing: I usually shoot in raw so I don’t often use this control but I have experimented with it. The black and white point droppers made no difference as there are correctly set with only small areas of the image clipped. First of all I tried the neutral point eye dropper and while this reduced the blue cast a bit it was not sufficiently noticeable.

I then tried adjusting the blue channel but the sunlit area became to yellow as I reduced the blue. I then started to play with the Contrast:colour range tool and reduced the colour cast even more.

However this was a bit fiddly and compared with using RAW and just re-setting the white balance it took much longer to come up with a satisfactory result. Using the RAW image gave this result by changing the white balance setting and making the image cooler (from 8000K to 7250K)

Following this, I was able to make a local adjustment using a colour control point to reduce the warmth of the sunlit area (-38 on a scale of –100 to +100) I deliberately left some warmth there, reducing the warmth excessively made the image appear odd.

Finally, I adjusted the brightness and contrast:

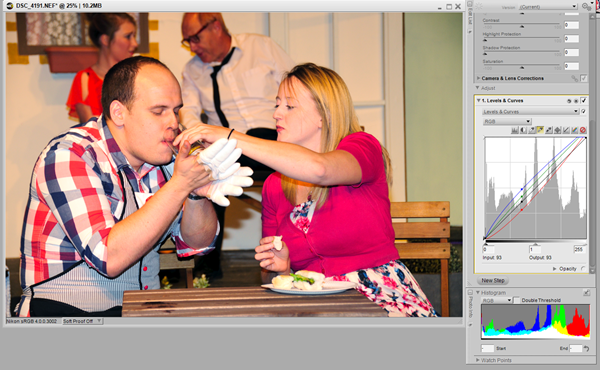
My second image has a different problem. It was taken under theatrical lighting with the white balance set to Auto. However the lights had strong amber gels giving a distinct yellow cast. I carried out all edits on the RAW file this time:

I set the white and black points using the relevant eye dropper tools and the mid tones with this result:

I dialled back the blue channel just an touch and reduced the brightness.

Summary This has been a useful exercise because I have not used the levels and curves tools very much in this application (Capture NX2). I will continue to practice these adjustments when they are required.
No comments:
Post a Comment