This is my learning log for the OCA Ditigal Photographic Practice course

Wednesday, 29 August 2012

Project–A sequence of actions


Objective:  To write a workflow for an open ended assignment in which the number of images will be unpredictable and in this case, take place on different dates in different locations. The initial stage will always be the same. Note the differences between this and  the structured, time limited assignment.

Exercise 2: Your own workflow 2

My own workflow for an open ended assignment:

For this exercise I am going to record a workflow for a street photography project I started several months ago. I call it “Shooting From the Navel”, a more literal description of a style of candid photography sometimes called “shooting from the hip”.
I tend to do this in bright conditions and try to use a small aperture and reasonably fast shutter.  I use auto ISO setting with 1/125s as a minimum.  I started in Boa Vista in Cape Verde last February.  I have shot in Regents Street, London, in Oxford, Falmouth and Chichester. This is still an experiment but I have a few interesting images which are languishing in folders on my external hard drive. This exercise will push me to bring it to the top of my to do list.


Before leaving home:

  • Check Camera and lenses are clean, charge battery and spare
  • Check and format SD Cards - Use in rotation
  • Check camera bag for equipment, lens tissue, blower brush, SD card cases
  • Notebook, pencil, mobile phone
  • Travel to Location

On arrival at location:

  • Final check on camera settings, exposure mode, white balance, image quality (RAW +JPEG)
  • Find a suitable location in the street where I can stand out of the way but have a good view of approaching pedestrians.
  • Occasionally shoot while walking slowly along the street
  • Record SD cards used and store in cases

Editing:

  • Download images to PC
  • Store images in a “Location” folder prior to processing
  • Technical edit – look at images in the browser and remove those under/over exposed, blurred etc.
  • Consider images with potential and follow workflow below
image
Conclusions: As I already have a lot of  the images for this project, the flow diagram above has put my workflow into context and will hopefully enable me to get on with the editing process. The main barrier to getting on with this was that I had images all over the place. Now I have organised them into specific folders, I can progress with confidence. My next post will show the “results so far” .

Tuesday, 28 August 2012

Project: Editing


Exercise 4: Editing
Objective: Start with a set of recently shot images (at least 50) and edit down to two acceptable images which would be suitable for possible submission to a publisher.
This shoot is also used as the basis for Exercise 1 Your own workflow 1.
Background for Assignment
I decided to allow myself 2 hours to photograph Uppark House and Gardens to produce two images, for an illustrated article or tourist brochure. I tried not to reproduce the National Trust images although I found this rather difficult as viewpoints were limited. This did influence my editing choices. I did not have time to photograph inside the house. Although I did take100 shots, I restricted my choice to those images which contained the buildings and gardens or just the buildings. This first selection produced 66 images using the “star” grading system.

image

From here I eliminated the standard view of the house shown on the Trust’s website, i.e. south face centre frame showing the typical Georgian symmetry and any that were just close up details of the buildings. This left 53 images from which to proceed.
Technical Edit: Next I eliminated any views of the house that were not in  full sunshine, blurred, wrongly exposed etc., leaving 34 “selects” from which to choose technically fine images.

image

First Selects: From these I selected 7 images for my first select, marked with a red 1. After a couple of hours I went back to look at these and confirmed to myself that they were my final choices.

image

A Final Choice: I have chosen these two images as my final choices (marked with a green 4) for the following reasons:
I chose the west front of  the building (image 0969) as it is not one that I have seen used before. It also put the house in its context with the South Downs included to the right of the frame. The three faces to the house are all very similar which makes it unmistakeable. Without a perspective control lens it is very difficult to photograph from the front of the house as the land falls away which has the effect of burying the bottom of the house in the bank. My images from the southwest and southeast corners are OK but using a wide angle lens tilts the verticals a bit too much. The east front is used already in the Trust’s website.
The house at Uppark consists of three main buildings and I have included the clock on what is now the restaurant and shop, appearing above the gardens. The clock is visible  from many parts of  the site, is a useful reference point for visitors and is an icon of Georgian architecture.

image

Conclusions: I have found this a very useful exercise. I would not normally go to so much trouble  when selecting images but I was pleased to find how easy it was once I had decided on a way of marking and filtering my selections. Hopefully the brief for a real shoot would have been a lot more specific and I would have started with less images. Had it been a speculative shoot for stock, it may have been more difficult but I would have imposed my own limits on what and what not to shoot.

Saturday, 25 August 2012

Project: Histograms


Exercise 3: Histogram
Objective: To increase my familiarity with the histogram by relating it to images I have just shot.
I used the manual setting on my camera and auto bracketing , 3 shots with 0, +1 and –1 EV
Highlight and shadow clipping display: Capture NX2 will show a detailed image of lost shadows and highlights using different colours for different channels but does not display a warning. My camera shows only  overexposed highlights on its LCD screen.
Here are the nine images, their histograms, exposure details and my notes:
High Contrast: –1.0 EV (this image shows a full range of tones from black to white)

DSC_0896_web
image
Image 0896
1/200s
f11
-1.0 EV
ISO 200
28mm

imageimage
Lost HighlightsLost Shadows
In this image, which is under exposed by one EV, appears darker and there are some blocked shadows as shown by the lost shadows display. The lost highlights are minimal on the display. The histogram shows the darker tones pushed up again the left, showing that here are indeed blocked shadows.


High Contrast +1.0 EV
DSC_0897_web
imageImage 0897

1/50s

f11

+ 1.0 EV

ISO 200

28mm
imageimage
Lost HighlightsLost Shadows
This image is over exposed by one EV and looks much lighter. The lost highlights are very apparent but there is no evidence of shadows being blocked. The values on the histogram are pushed the other way, right up against the right side and the darker tones cover the range almost the the black end.


High Contrast 0 EV
DSC_0898_web
imageImage 0898

1/100s

f11

0 EV

ISO 200

28mm
imageimage
Lost HighlightsLost Shadows
This image is exposed at 0 EV i.e. as indicated by the camera’s meter, there are no blocked shadows but the highlights are clipped predominately in the blue channel. The shadow end of the histogram is fairly precisely shown not quite against the left side.
With this lens (18 – 200mm zoom) I tend to set the meter to –0.7 EV compensation and keep an eye on the clipped highlights warning on the LCD display whilst shooting. I always shoot in RAW and this gives me retrospective control of exposure and camera settings.


Average Contrast  0 EV 
DSC_0863_web
imageImage 863

1/100s

f11

0 EV

400 ISO

200mm

imageimage
Lost HighlightsLost Shadows
This average contrast image has the majority of its tones concentrated around the central part of  the histogram. The highlights clipped are mostly in the red channel but these are more prominent after conversion from RAW to jpeg and image resizing. There is no shadow clipping.


Average contrast –1.0 EV
DSC_0864_web
imageImage 864

1/200s

f11

-1.0 EV

ISO 400

200mm
imageimage
Lost HighlightsLost Shadows
1 EV less exposure has moved the tones in the histogram to the left. The clipped highlights are reduced and there are no discernable lost shadows. This image is probably the most acceptable of the three.


Average Contrast +1.0 EV
DSC_0865_web
imageImage 865

1/50s

f11

+1.0 EV

ISO 400

200mm
imageimage
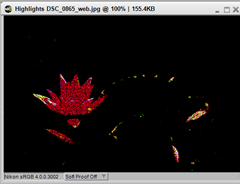
Lost Highlights
Lost Shadows
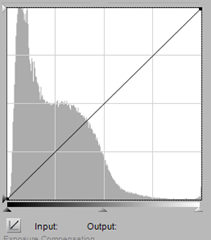
Overexposing by 1 EV has given the image the typical washed out look, the lost highlights have increased and there is some shadow clipping in two channels. The histogram has shifted to the right.


Low Contrast  + 1.0 EV I was struggling to find a low contrast scene to shoot so I waited until dusk and took s photograph of my back garden.
DSC_0900_web
imageImage 0900

1/2.5s

f11

+1.0EV

ISO 3200

22mm
imageimage
Lost HighlightsLost Shadows
At +1.0 EV, the tones have moved further to the right and are slightly clipped. There are no blocked shadows.


Low Contrast 0 EV
DSC_0901_web
imageImage 0901

1/5s

f11

0 EV

ISO 3200

22mm
imageimage
Lost HighlightsLost Shadows
Typical low contrast at 0 EV sees the tones predominately to one side of the histogram. There is a small amount of clipping where the sky shows through the trees but there is no shadow blocking.


Low Contrast –1.0 EV
DSC_0902_web 
imageImage 0902

1/10s

f11

-1.0 EV

ISO 3200

22mm
imageimage
Lost HighlightsLost Shadows

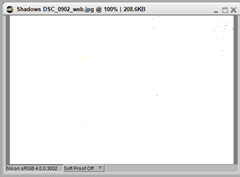
With underexposure, the tones move further to the left of the histogram but still with minimal clipping and no shadow blocking.
Conclusions: I have been familiar with the purpose and use of the histogram for some time. I regularly under expose my images using the exposure compensation control ay my camera’s settings tend to produce slightly over exposed images. I have noticed the difference between the histograms for jpeg and raw images and will make allowances for this on converting from RAW to jpeg files.
This has been a useful exercise to consolidate my knowledge


.


Project–a sequence of actions


Exercise 1: Your own workflow 1
Objective: Devise and then put into practice a workflow that suits you personally for a specific short assignment and make notes of your experience of this in your learning log.
Assignment:  Produce photographs of a National Trust property suitable for publication in a tourist brochure or information sheet. (had this been a professional assignment I would have contacted the National Trust. I checked their photography policy and as student assignment, I treated this as a “not for commercial use” exercise)

My own workflow for a time limited assignment:

Before leaving home:

  • Check Camera and lenses are clean, charge battery and spare
  • Check and format SD Cards - Use in rotation
  • Check camera bag for equipment, lens tissue, blower brush, SD card cases
  • Notebook, pencil, mobile phone
  • Drive to Location

On arrival at location: (2 hours 1300 – 1500)

  • Final check on camera settings, exposure mode, white balance, image quality (RAW +JPEG)
  • Check light quality and direction in relation to the subject
  • Walk around the location to find suitable viewpoints. Make a note of the ones you want to use
  • Commit a few images to SD card to check for exposure (highlight and shadow clipping from the histogram) Adjust exposure compensation accordingly
  • When the light is right, shoot the chosen locations.
  • Allow time for the sun to move to highlight areas of the scene if necessary
  • Record SD cards used and store in cases
  • Return home  to edit images

Image Editing

  • Transfer images to PC
  • Perform technical edit
  • Select satisfactory images from those remaining
  • Make first selects
  • Find several of the best images
  • Review your best selection
  • Process images (see personal workflow here)
  • Choose two images for submission
I chose to use this exercise in combination with Exercise 4 (Editing). Click the link to see the images.
Conclusions:  I designed the workflow in light of my experience with the Art of Photography assignments that involved a specific project (i.e. Liphook Carnival) and I am pleased to say it worked very well. There is nothing I would change and the only problem I had was waiting around for people to move out of shot and/or for the clouds to move away from the sun. Luckily the two hours I allowed, had some contingency built in for this reason.

Sunday, 19 August 2012

Project – A sequence of actions


Exercises 1 and 2
Workflow: As suggested in the learning materials, I will complete these exercises as part of later assignments.
Meanwhile I thought it would be a good exercise just to note down what my current practice is.
  • Check camera and lenses are clean
  • Charge battery and spare
  • Check camera bag for equipment (lenses, HD cards, lens tissues, notebook, pencil etc.)
  • Reset camera to default settings
  • Change settings to the situation. (I have two basic schemes depending whether I’m shooting indoors or out)
  • Shoot
  • Remove SD cards and store in cases.
  • Load images onto PC using Nikon Transfer. (Images are saved to external and internal drives and after processing are archived to CD and indexed)
  • View in Capture NX2, delete any gash files
  • Select acceptable images and grade them
From this point my workflow, the processing follows this list
  1. Geometric corrections. (crop, lens distortion, horizontal and vertical corrections)
  2. Remove colour casts (white balance adjustments)
  3. Initial retouching (spots, dust etc. using auto retouch)
  4. Adjust tone and contrast
  5. Perform colour correction (global or local)
  6. Final tweaks
  7. Sharpen and output the image
There is a wealth of information and advice on workflow but individual circumstances and preferences will dictate exactly how the process is carried out. A thorough understanding of each step will enable you to be flexible in your approach.